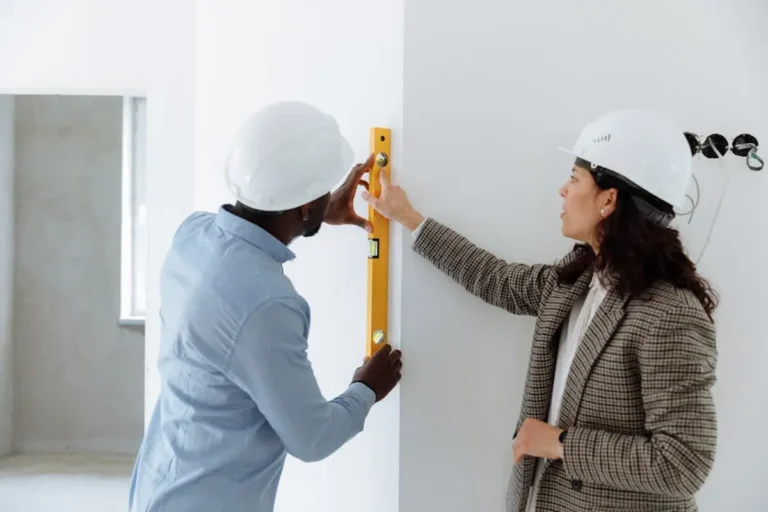

Transforming an unfinished basement offers a significant opportunity to expand a home's functional living space and potentially increase its market value. However, this undertaking represents a substantial investment of time, resources, and capital. For homeowners embarking on this journey, a clear understanding of the process, from initial planning to final touches, is crucial for achieving a successful outcome that aligns with both budget and lifestyle needs. Approaching a basement remodel strategically ensures the new space is not only aesthetically pleasing but also safe, functional, and compliant with local regulations.
Planning Your Basement Remodel
Effective planning forms the bedrock of any successful basement renovation. This stage involves more than just envisioning the final look; it encompasses defining the space's purpose, establishing a realistic budget, and navigating the necessary regulatory landscape.
Defining Your Basement's Purpose
Before any demolition or design work begins, clarify the primary function of your remodeled basement. This decision directly influences layout, material choices, and overall cost. Common uses include:
- Additional Living Area: Family rooms, home theaters, or recreation spaces often require robust soundproofing, comfortable flooring, and integrated lighting.
- Guest Suite or Rental Unit: This necessitates a full bathroom, often a kitchenette, and a separate entrance if local zoning permits. Egress windows are non-negotiable for safety.
- Home Office or Gym: Focus on adequate lighting, durable flooring, and dedicated electrical circuits for specialized equipment. Sound insulation can be beneficial for offices.
- Utility & Storage: While less glamorous, optimizing storage and utility areas can significantly improve home organization. Consider built-in shelving, durable utility sinks, and easy access to mechanical systems.
Each purpose carries specific requirements that impact structural modifications, utility extensions, and finishing materials. A clear purpose streamlines subsequent design and budgeting decisions.
Budgeting and Financing Considerations
A detailed budget is non-negotiable. Beyond the visible costs of materials and labor, homeowners must account for:
- Permit Fees: These vary significantly by municipality and project scope.
- Contingency Fund: Allocate 10-20% of your total budget for unforeseen issues, such as discovering mold, structural problems, or outdated electrical/plumbing during demolition.
- Professional Fees: Architects, engineers, and designers may be necessary, particularly for complex layouts or structural changes.
- Finishing Touches: Furniture, decor, and landscaping around new egress windows can add up quickly.
Financing options typically include home equity loans, lines of credit, or personal loans. Researching interest rates and repayment terms is critical to selecting a sustainable financing path.
Understanding Local Building Codes and Permits
Compliance with local building codes is not optional; it ensures safety, structural integrity, and future resale value. Basements often have specific regulations regarding:
- Egress: Every habitable basement bedroom requires an egress window or door that meets specific size and height requirements for emergency exit.
- Ceiling Height: Minimum ceiling heights are often mandated, impacting framing and ductwork.
- Moisture Control: Codes may specify waterproofing methods, vapor barriers, and drainage systems.
- Electrical and Plumbing: All new installations must meet current safety standards and be inspected.
- Insulation and Ventilation: Energy efficiency codes dictate insulation levels and proper airflow.
Pro Tip: Always secure all necessary permits *before* starting any work. Proceeding without permits can lead to fines, forced demolition, and significant difficulties when selling the home, as unpermitted work may not be insurable or legally recognized.
Design and Layout Essentials
Once the foundational planning is complete, the design phase translates purpose into a functional blueprint. This involves optimizing space, selecting appropriate materials, and proactively addressing common basement challenges.
Maximizing Space and Light
Basements are inherently prone to feeling dark and cramped. Strategic design can counteract this:
- Open Concepts: Minimizing interior walls can create a more expansive feel.
- Lighting Design: Incorporate a mix of ambient (recessed lights), task (under-cabinet lighting), and accent lighting. Prioritize fixtures that mimic natural light.
- Egress Windows: Beyond code compliance, these introduce natural light and ventilation. Consider window wells that allow for landscaping.
- Light-Colored Finishes: Walls, ceilings, and flooring in lighter hues reflect light, making the space appear larger and brighter.
- Mirrors: Strategically placed mirrors can visually expand a room.
Flooring and Wall Material Choices
Material selection for basements must prioritize moisture resistance and durability due to the environment:
- Flooring:
- Luxury Vinyl Plank (LVP) or Tile: Excellent for moisture resistance, durability, and a wide range of aesthetic options.
- Engineered Hardwood: Can be used if proper subfloor and moisture barriers are in place, but solid hardwood is generally not recommended.
- Carpet: Choose low-pile, synthetic options with moisture-resistant padding if comfort and warmth are priorities.
- Walls:
- Moisture-Resistant Drywall: Often referred to as "green board" or "purple board," these products are designed to resist moisture and mold.
- Insulated Wall Panels: Systems that combine insulation, framing, and often a finished surface can simplify installation and improve energy efficiency.
Addressing Moisture and Insulation
Preventing moisture issues is paramount in a basement remodel. This often involves:
- Exterior Waterproofing: Addressing exterior drainage, repairing foundation cracks, and installing perimeter drains if necessary.
- Interior Waterproofing: Sealants, vapor barriers, and sump pumps can manage interior moisture.
- Proper Insulation: Insulate walls, rim joists, and sometimes floors to prevent heat loss and condensation, contributing to comfort and energy savings. Rigid foam insulation or spray foam are effective choices for basement walls.
The Remodeling Process: Key Stages
A basement remodel typically follows a structured sequence of steps, moving from rough work to finishing touches. Understanding this progression helps manage expectations and coordinate contractors.
Demolition and Structural Work
This initial phase involves removing existing finishes, non-load-bearing walls, and any outdated systems. If the design requires structural modifications, such as adding support beams or relocating load-bearing walls, this work occurs early and often requires an engineer's stamp of approval. Any necessary foundation repairs or exterior waterproofing also fall into this stage.
Electrical, Plumbing, and HVAC Rough-Ins
With the space cleared and any structural changes complete, the "rough-in" stage begins. This involves installing new electrical wiring, plumbing lines (for bathrooms, kitchenettes, or wet bars), and extending HVAC ducts and vents. All these systems are run through walls, ceilings, and floors before they are enclosed. This phase requires licensed professionals and multiple inspections to ensure compliance with safety codes.
Finishing Touches: Drywall, Paint, and Fixtures
Once rough-ins are inspected and approved, the space begins to take shape. Drywall installation, taping, and mudding create smooth wall and ceiling surfaces. This is followed by priming and painting. Flooring is installed, and then cabinets, countertops, trim work, doors, and light fixtures are added. The final steps include installing plumbing fixtures, appliances, and any built-in shelving or storage solutions, bringing the vision to life.
Ensuring a Lasting Investment
A well-executed basement remodel significantly enhances a home's value and livability. By meticulously planning the space's purpose, adhering to a realistic budget, and diligently complying with local building codes, homeowners can avoid common pitfalls. Prioritizing moisture control, energy efficiency, and effective lighting throughout the design and construction phases ensures the new basement space is not only beautiful but also comfortable, durable, and a true asset for years to come. Engaging qualified professionals for specialized tasks, such as electrical and plumbing, is a critical investment in both safety and the long-term integrity of the remodel. To ensure a smooth process, consider consulting a basement remodeling checklist before you start your project.
Frequently Asked Questions
How long does a typical basement remodel take?
The timeline varies significantly based on complexity. A basic finishing project might take 4-8 weeks, while a full remodel with new bathrooms, kitchens, and structural changes could extend to 3-6 months or more, especially factoring in permit approvals and inspections.
What is the average return on investment (ROI) for a basement remodel?
ROI for basement remodels can range from 70% to 75%, depending on the scope of work, local market conditions, and the quality of finishes. Adding a legal bedroom and bathroom typically yields a higher return.
Is DIY basement remodeling a good idea?
While some homeowners handle demolition or painting, critical tasks like electrical, plumbing, HVAC, and structural work should always be performed by licensed professionals. Improper DIY work can lead to safety hazards, code violations, and costly repairs down the line.
How can I prevent mold and mildew in my finished basement?
Effective mold prevention involves proper exterior drainage, sealing foundation cracks, installing vapor barriers on walls and floors, ensuring adequate insulation, and maintaining consistent humidity levels with a dehumidifier, especially in warmer months.